Unlock Pull-Up Power with Resistance Bands: Clench Fitness Tips
Posted by Melinda Noah on
Unlocking the Power of Resistance Bands: Mastering the Pull-Up with Clench Fitness
Are you struggling to complete pull-ups or chin-ups? Do you find yourself wondering how to do a pull-up if you can’t do one? Look no further! Our latest video on the Clench Fitness YouTube Channel, "Resistance Band Pull Up - Banded Chin Up 2023," is here to guide you through the process of using resistance bands to improve your pull-ups and build upper body strength.
Why Use Resistance Bands for Pull-Ups?
Pull-ups are an excellent bodyweight exercise that targets your upper body, specifically your back muscles, grip strength, and forearms. However, they can be quite challenging, especially for beginners. This is where resistance bands come in handy. By incorporating a 41-inch loop style resistance band into your routine, you can get the assistance you need to complete more pull-ups and gradually build your strength.
Setting Up Your Resistance Band Pull-Up
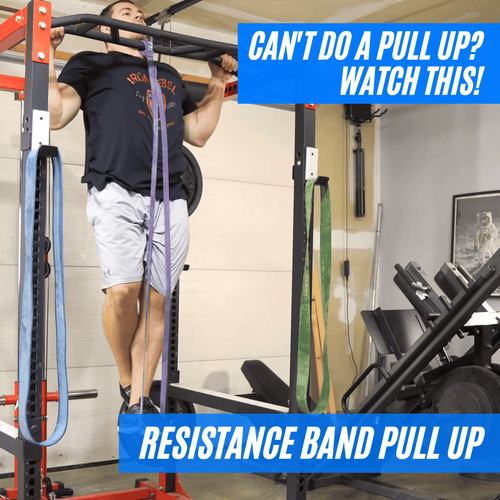
The concept is straightforward. Attach a 41-inch loop style resistance band to your pull-up bar, and hook it up to your knee or foot for added assistance. This setup allows you to complete more pull-ups by reducing the amount of bodyweight you need to lift.
At Clench Fitness, we offer high-quality resistance bands that come in various resistance levels to cater to different fitness levels:
- Purple Band (1.125" wide): Ideal for lighter individuals or those who can already complete 1-5 pull-ups.
- Green Band (1.75" wide): Suitable for moderate-weight individuals or those who struggle to complete 1-2 pull-ups.
- Blue Band (2.5" wide): Best for heavier individuals or those who can’t complete a single pull-up.
How to Use the Bands
- Attach the Band to the Bar: Secure the resistance band to your pull-up bar using a slipknot style wrap.
- Hook It Up to Your Knee or Foot: Depending on your height and the bar setup, you can hook the band around your knee or foot. Hooking it around your foot provides more resistance due to the greater stretch.
- Perform the Pull-Up: Get into your desired pull-up grip and start your pull-ups. Adjust the resistance by choosing the appropriate band to match your strength level.
Tips for Beginners
If you’re just starting out, it might be challenging to stretch the band and get it onto your foot. Begin with hooking it around your knee for easier setup. For extra assistance, you can use two lighter bands instead of one heavy band. This allows for easier attachment and adjustment.
Progressing with Pull-Ups
To build strength and progress with your pull-ups:
- Start with Higher Assistance: Begin with the band that offers the most assistance.
- Reduce Assistance Gradually: As you get stronger, switch to bands with lower resistance.
- Aim for Multiple Sets: Perform multiple sets per workout, reducing the band resistance with each set to increase the load on your muscles.
By consistently following this approach, you’ll eventually be able to perform pull-ups without any assistance.
Why Choose Clench Fitness Bands?
Clench Fitness bands are designed to be durable and long-lasting. They are an excellent investment for your fitness journey. Check out our 41-inch Resistance Bands to find the perfect fit for your needs.
Conclusion
Incorporating resistance bands into your pull-up routine is an effective way to enhance your strength and achieve your fitness goals. Watch our video, "Resistance Band Pull Up - Banded Chin Up 2023," for a detailed walkthrough on using these bands. Don’t forget to like, comment, and subscribe to our channel for more fitness tips and exercises. Visit Clench Fitness for high-quality resistance bands and other fitness gear.
Start your journey to mastering pull-ups today with Clench Fitness!